Products
- TOP
- Products
- DeviceXPlorer OPC Server
- SCADA Guide
- SCADA setting ICONICS GENESIS64
SCADA setting ICONICS GENESIS64
The following shows the setting method when our OPC Server (UA Server) is used with ICONICS SCADA "GENESIS64". For details on how to set up the SCADA, please contact ICONICS.
OPC UA communication settings
Start Workbench
Start Workbench from Windows start menu.
[Program] > [ICONICS Product Suite] > [Workbench]
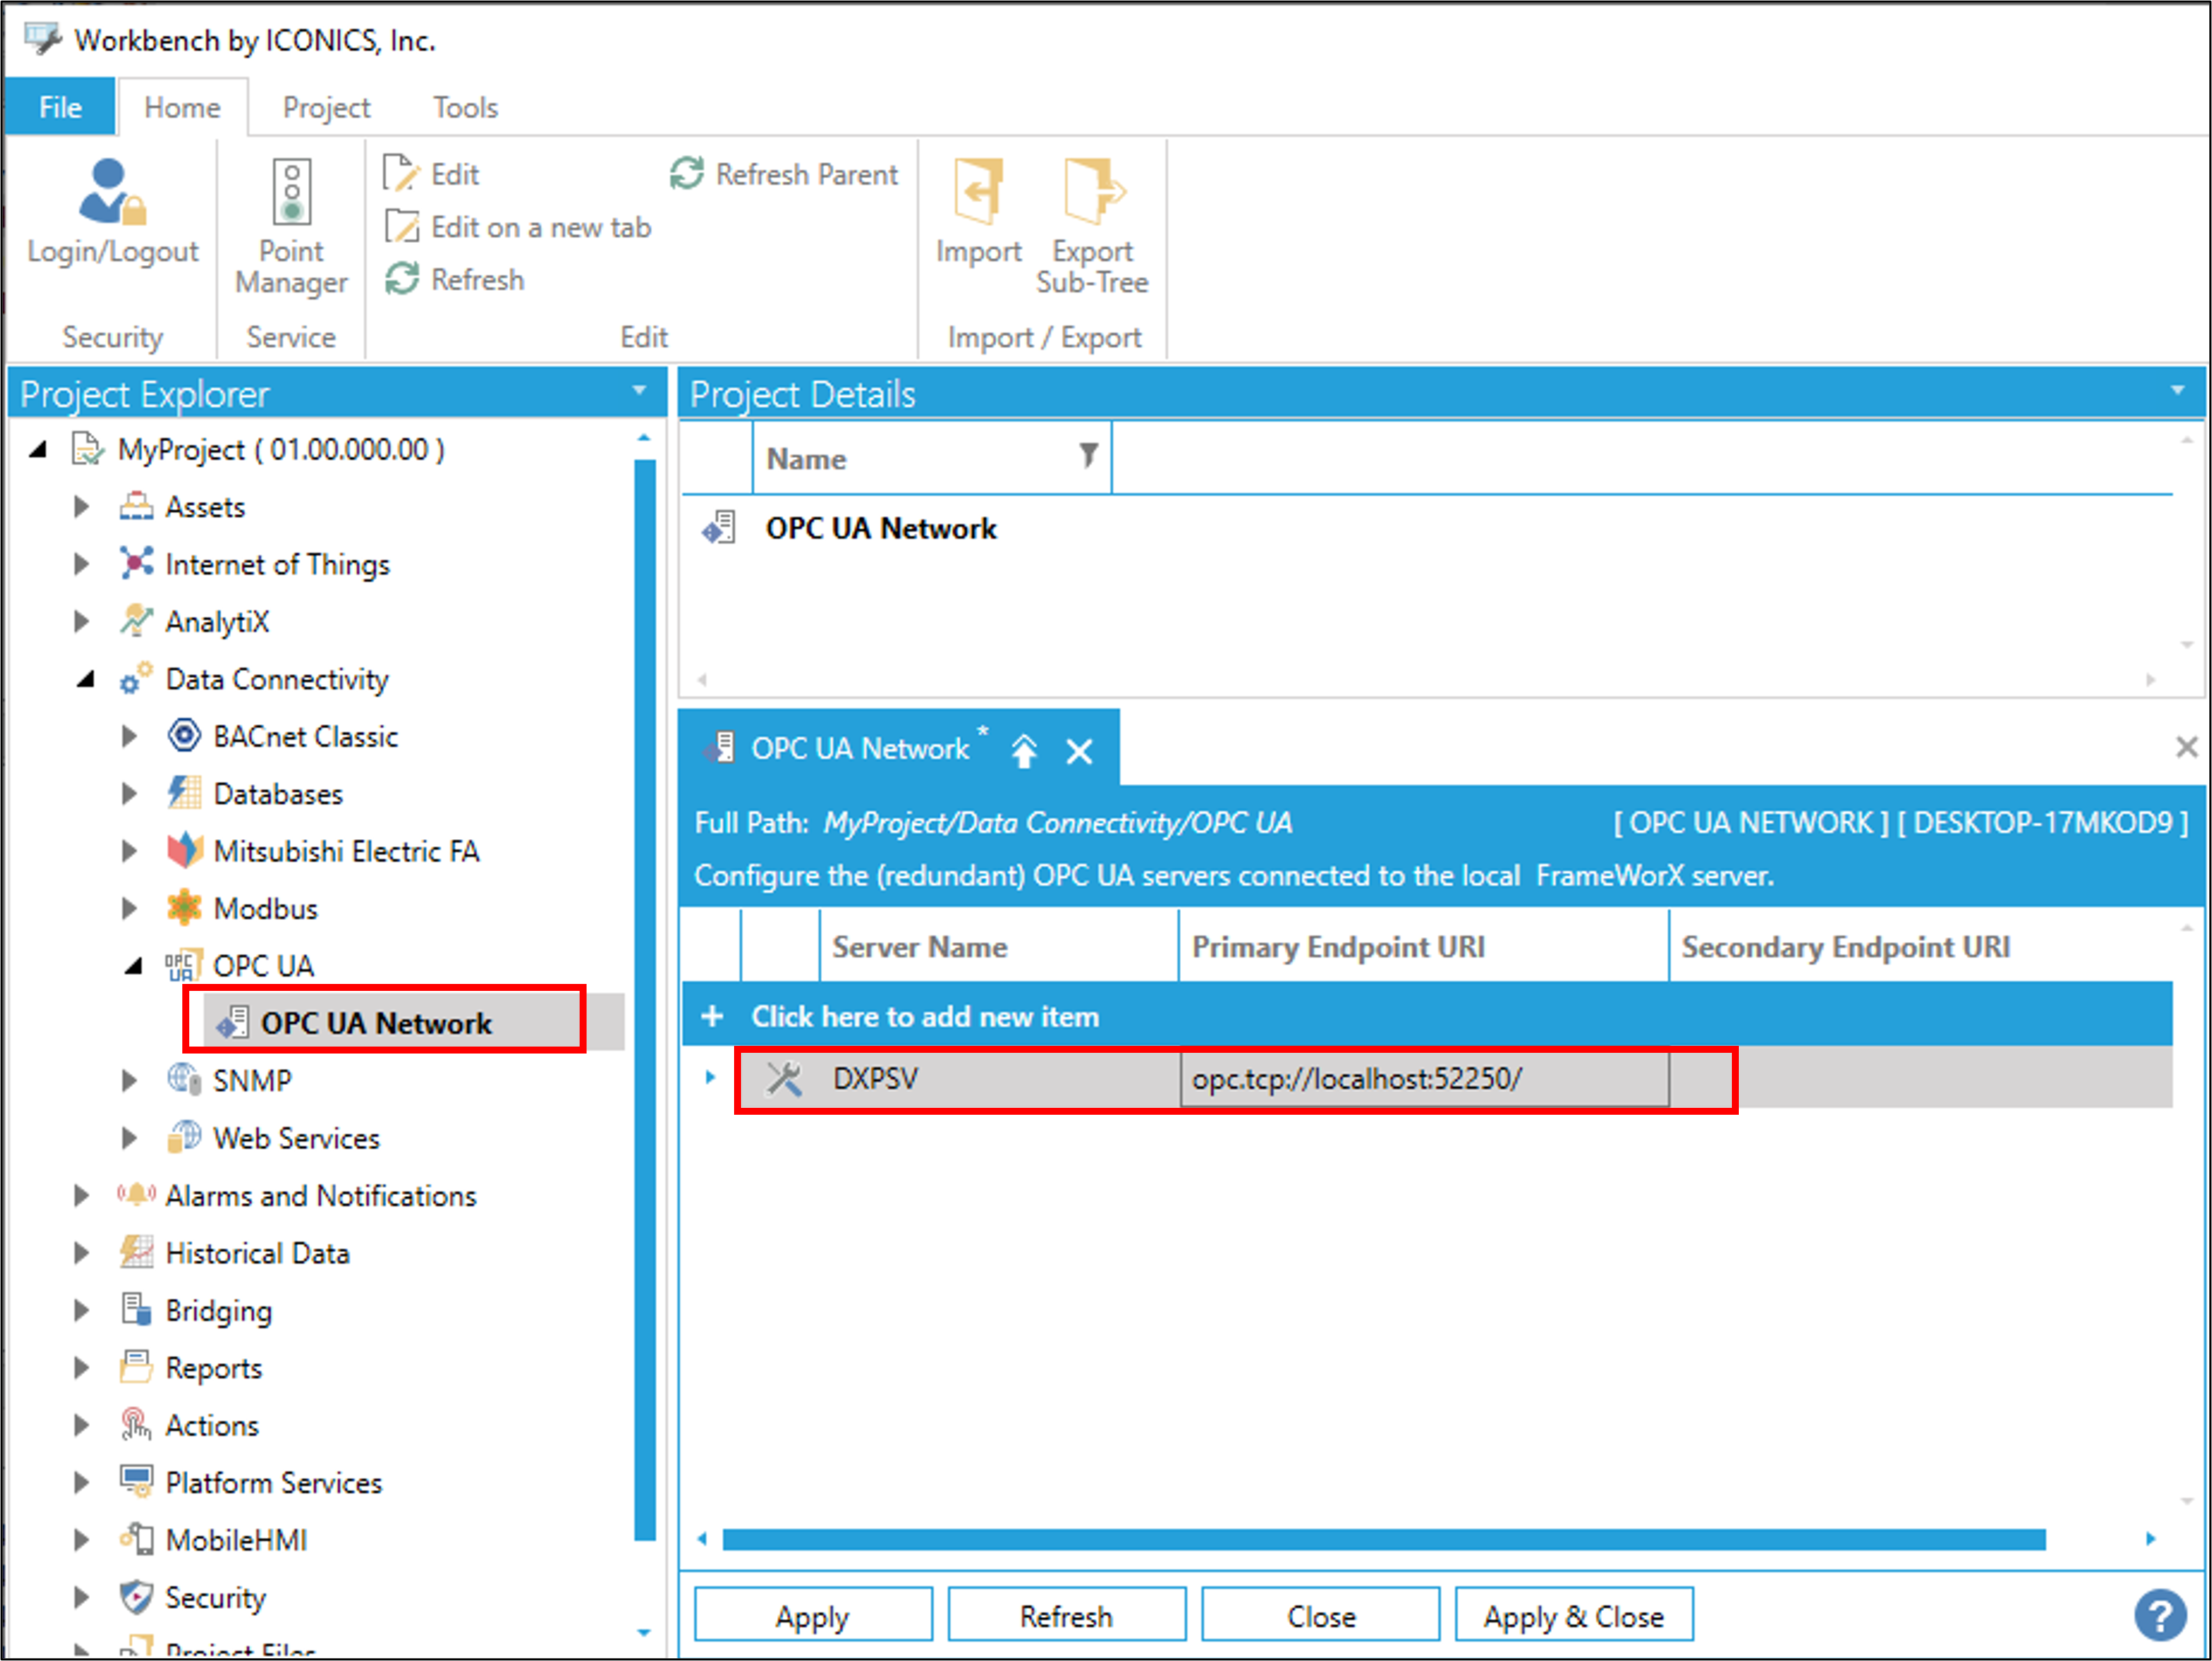
Network Settings
In Workbench, select in the Project tab; [Project Explorer] > [MyProject] > [Data Connectivity] > [OPC UA] > [OPC UA Network].
Right-click [OPC UA Network] and select [Edit].
Then click [Click here to add a new item] and set the server name and endpoint URI.
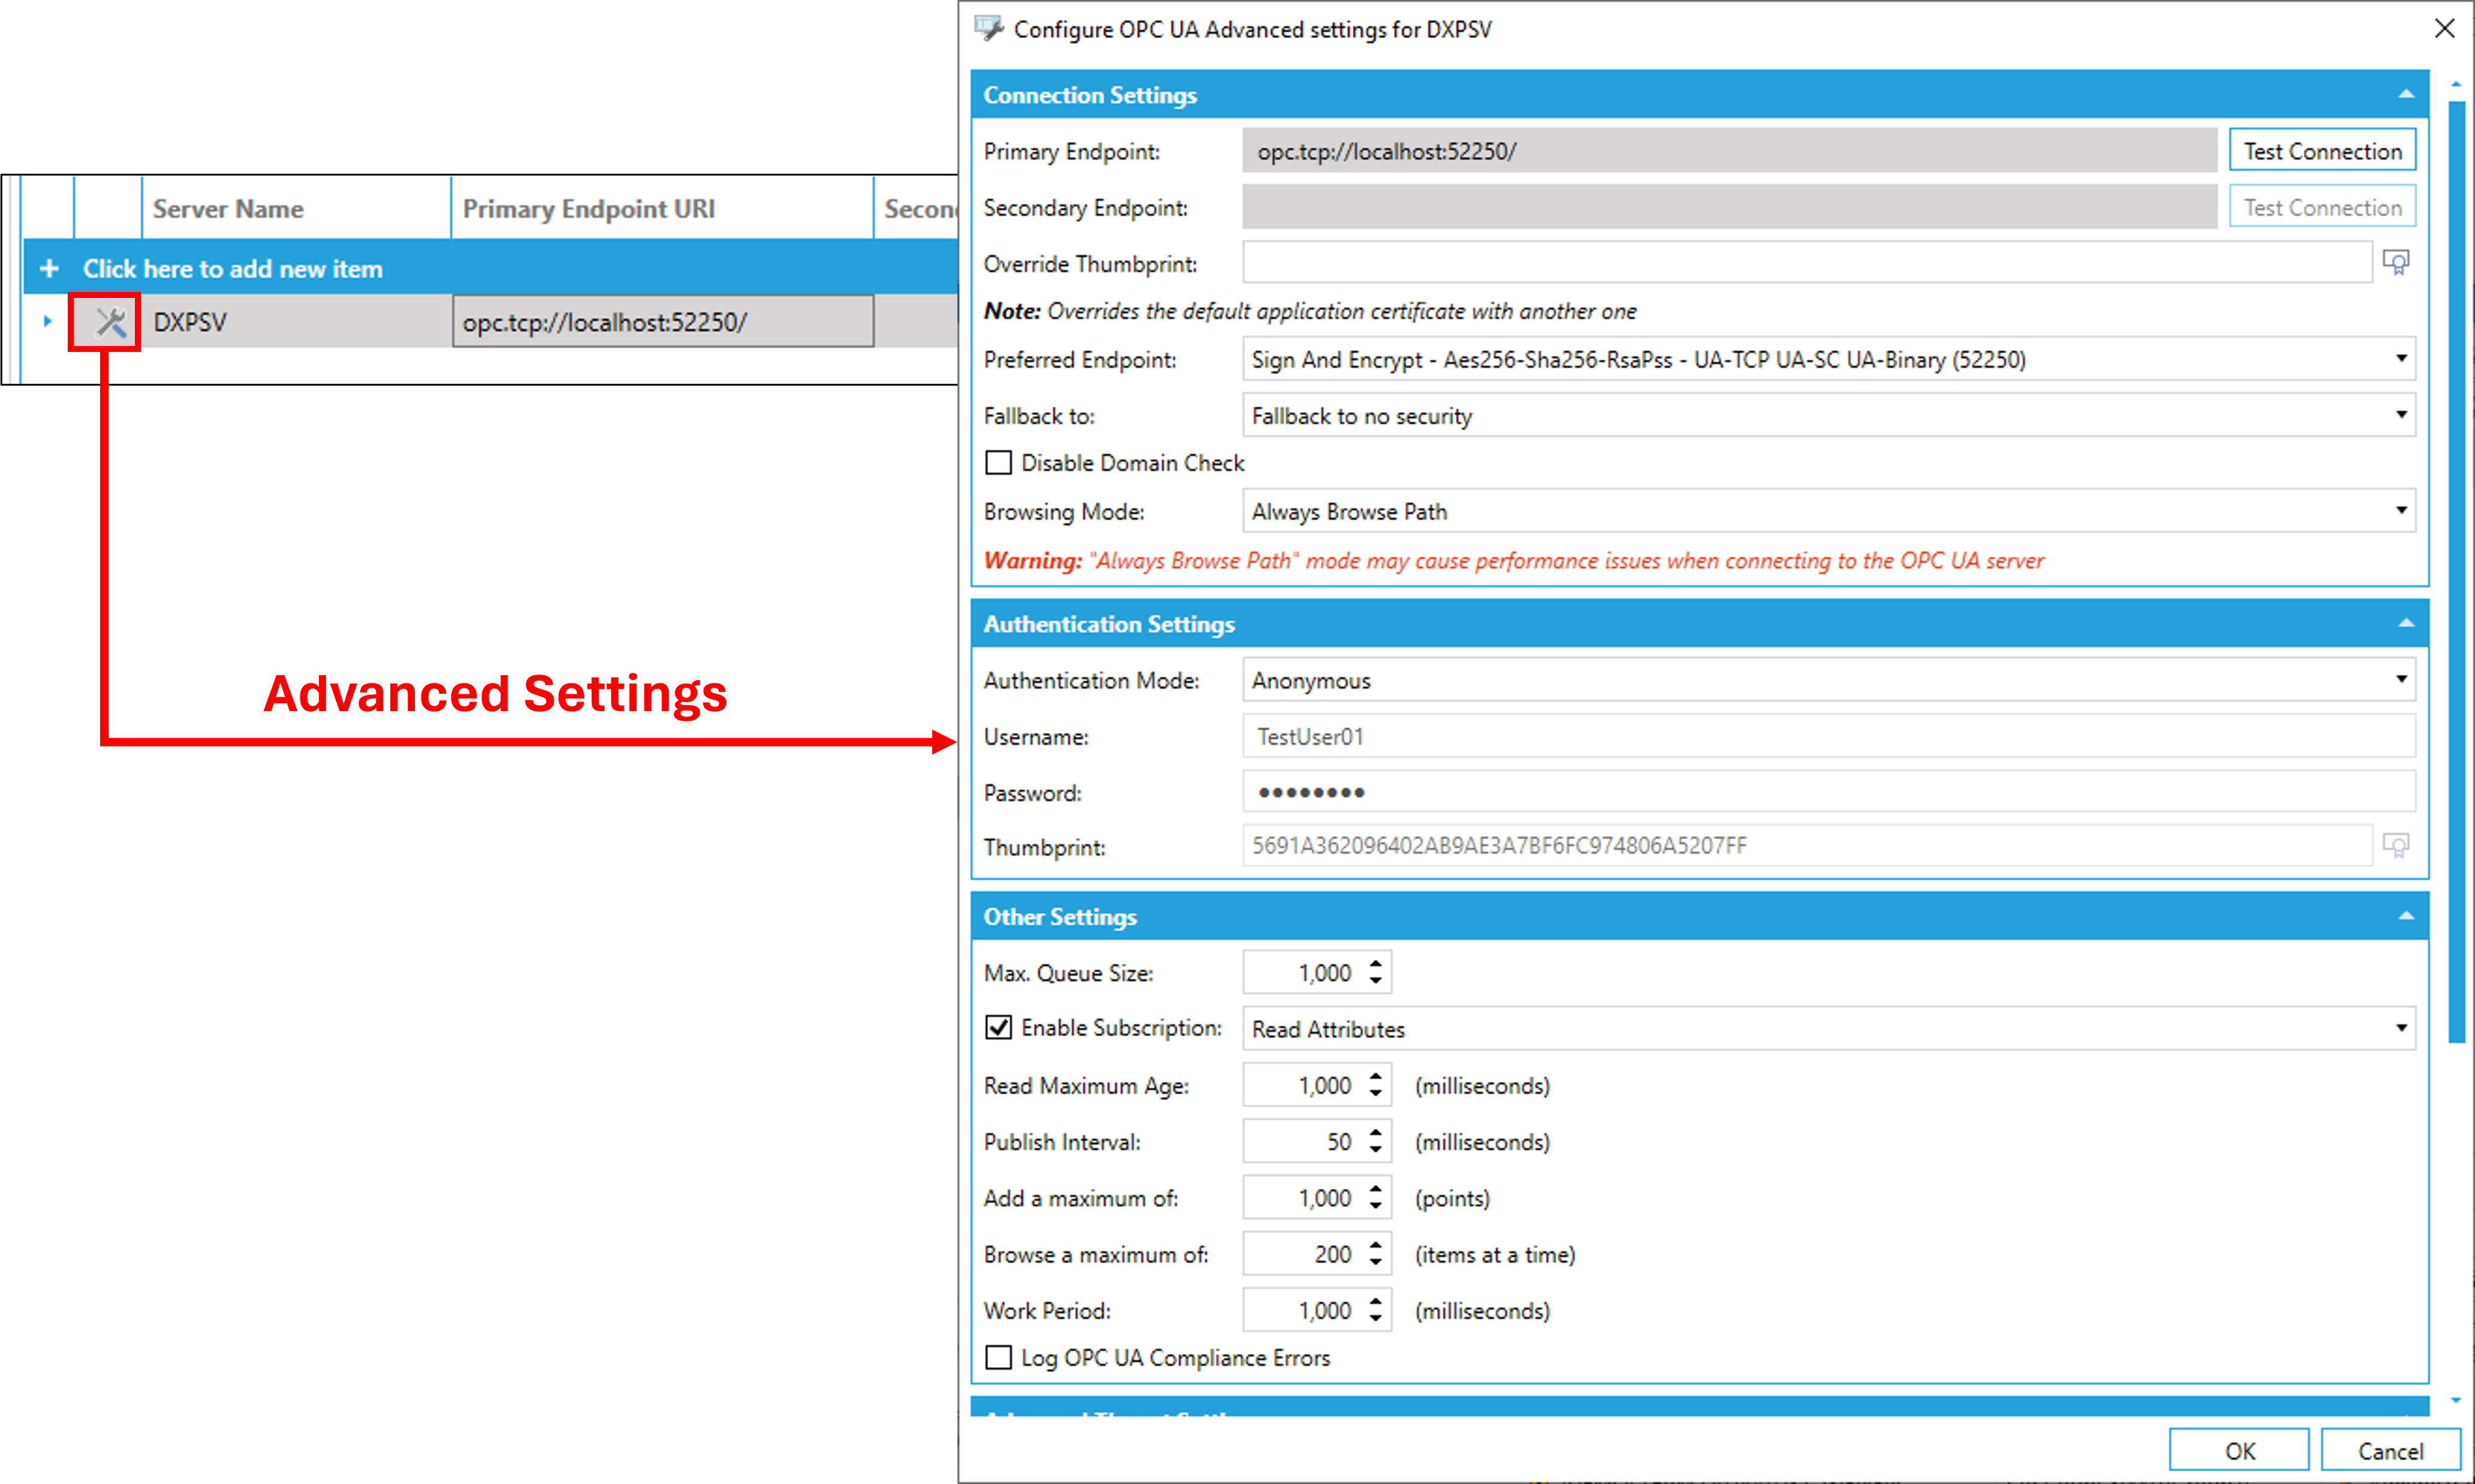
After setting the server name and endpoint URI, click [Advanced Settings].
Configure the necessary items such as UA certificate and security policy, then select [OK].
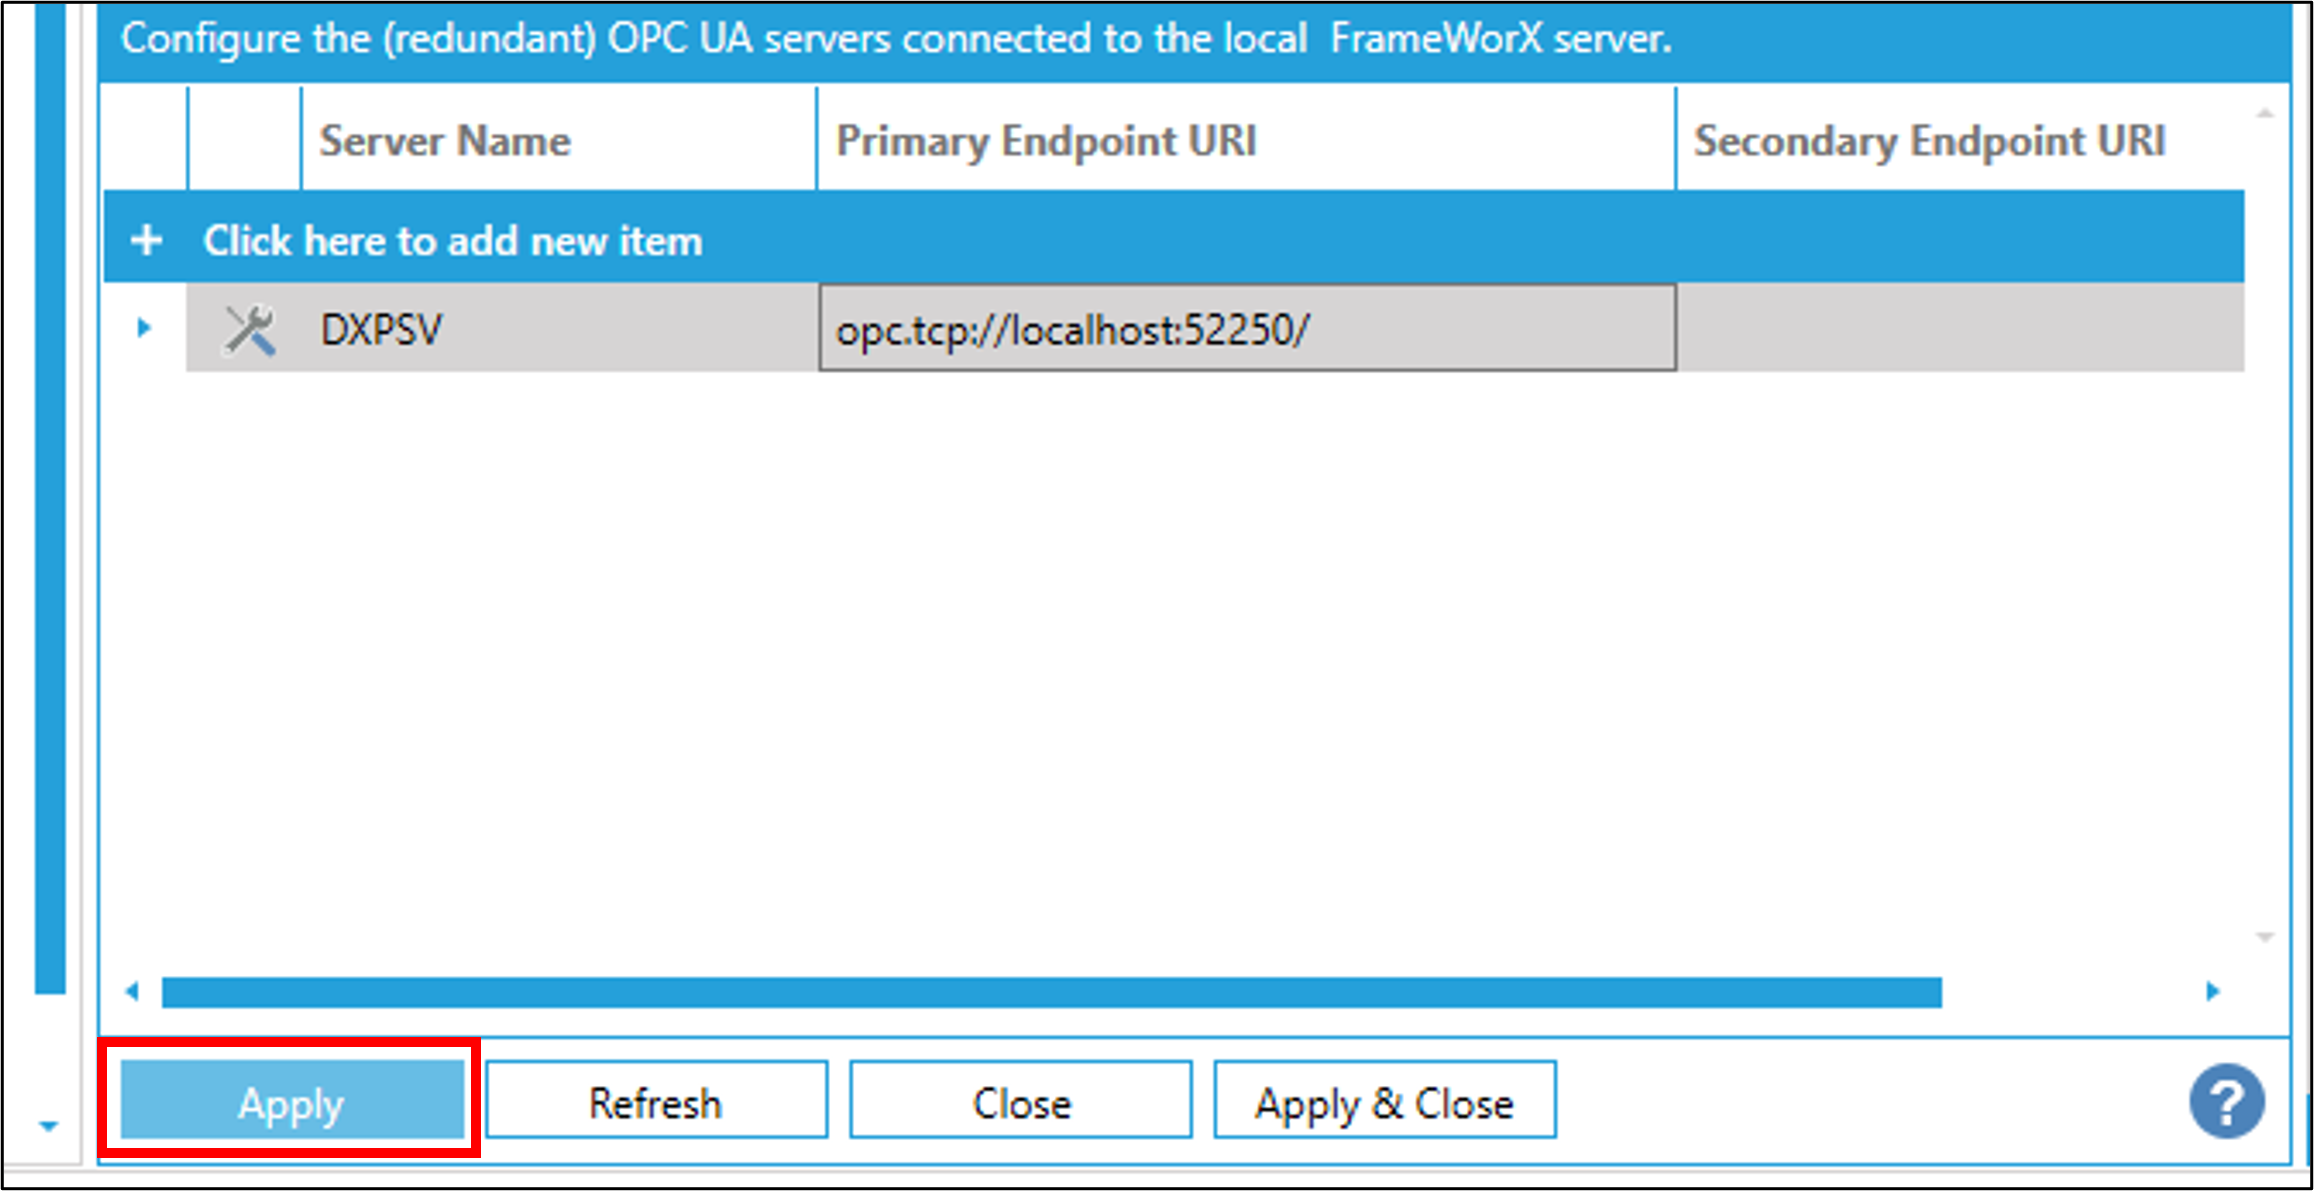
Lastly, don't forget to press [Apply] or [Apply & Close] button to apply the settings.
Creating the SCADA display
Start GraphWorX64
Start GraphWorX64 from Windows start menu.
[Programs]> [ICONICS Product Suite]> [GraphWorX64]
Create the SCADA display
Select any tab and the desired object. Drag and place the object to the desired position and size.
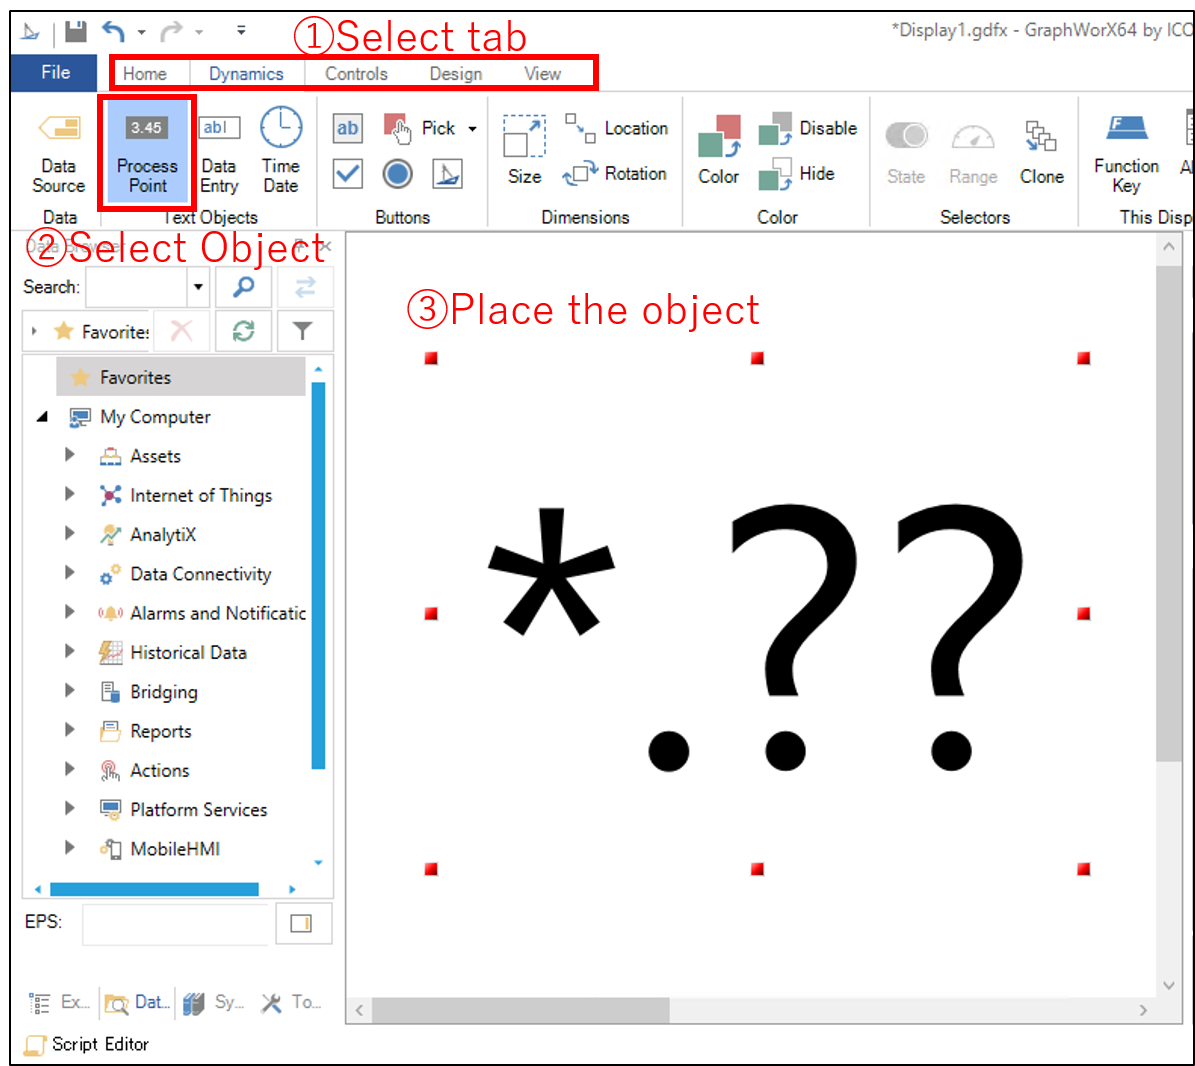
When select the placed object, the settings appears on the right side of the display.
Open the [Dynamics] tab in the settings, and then select [Data] > [Data Source].
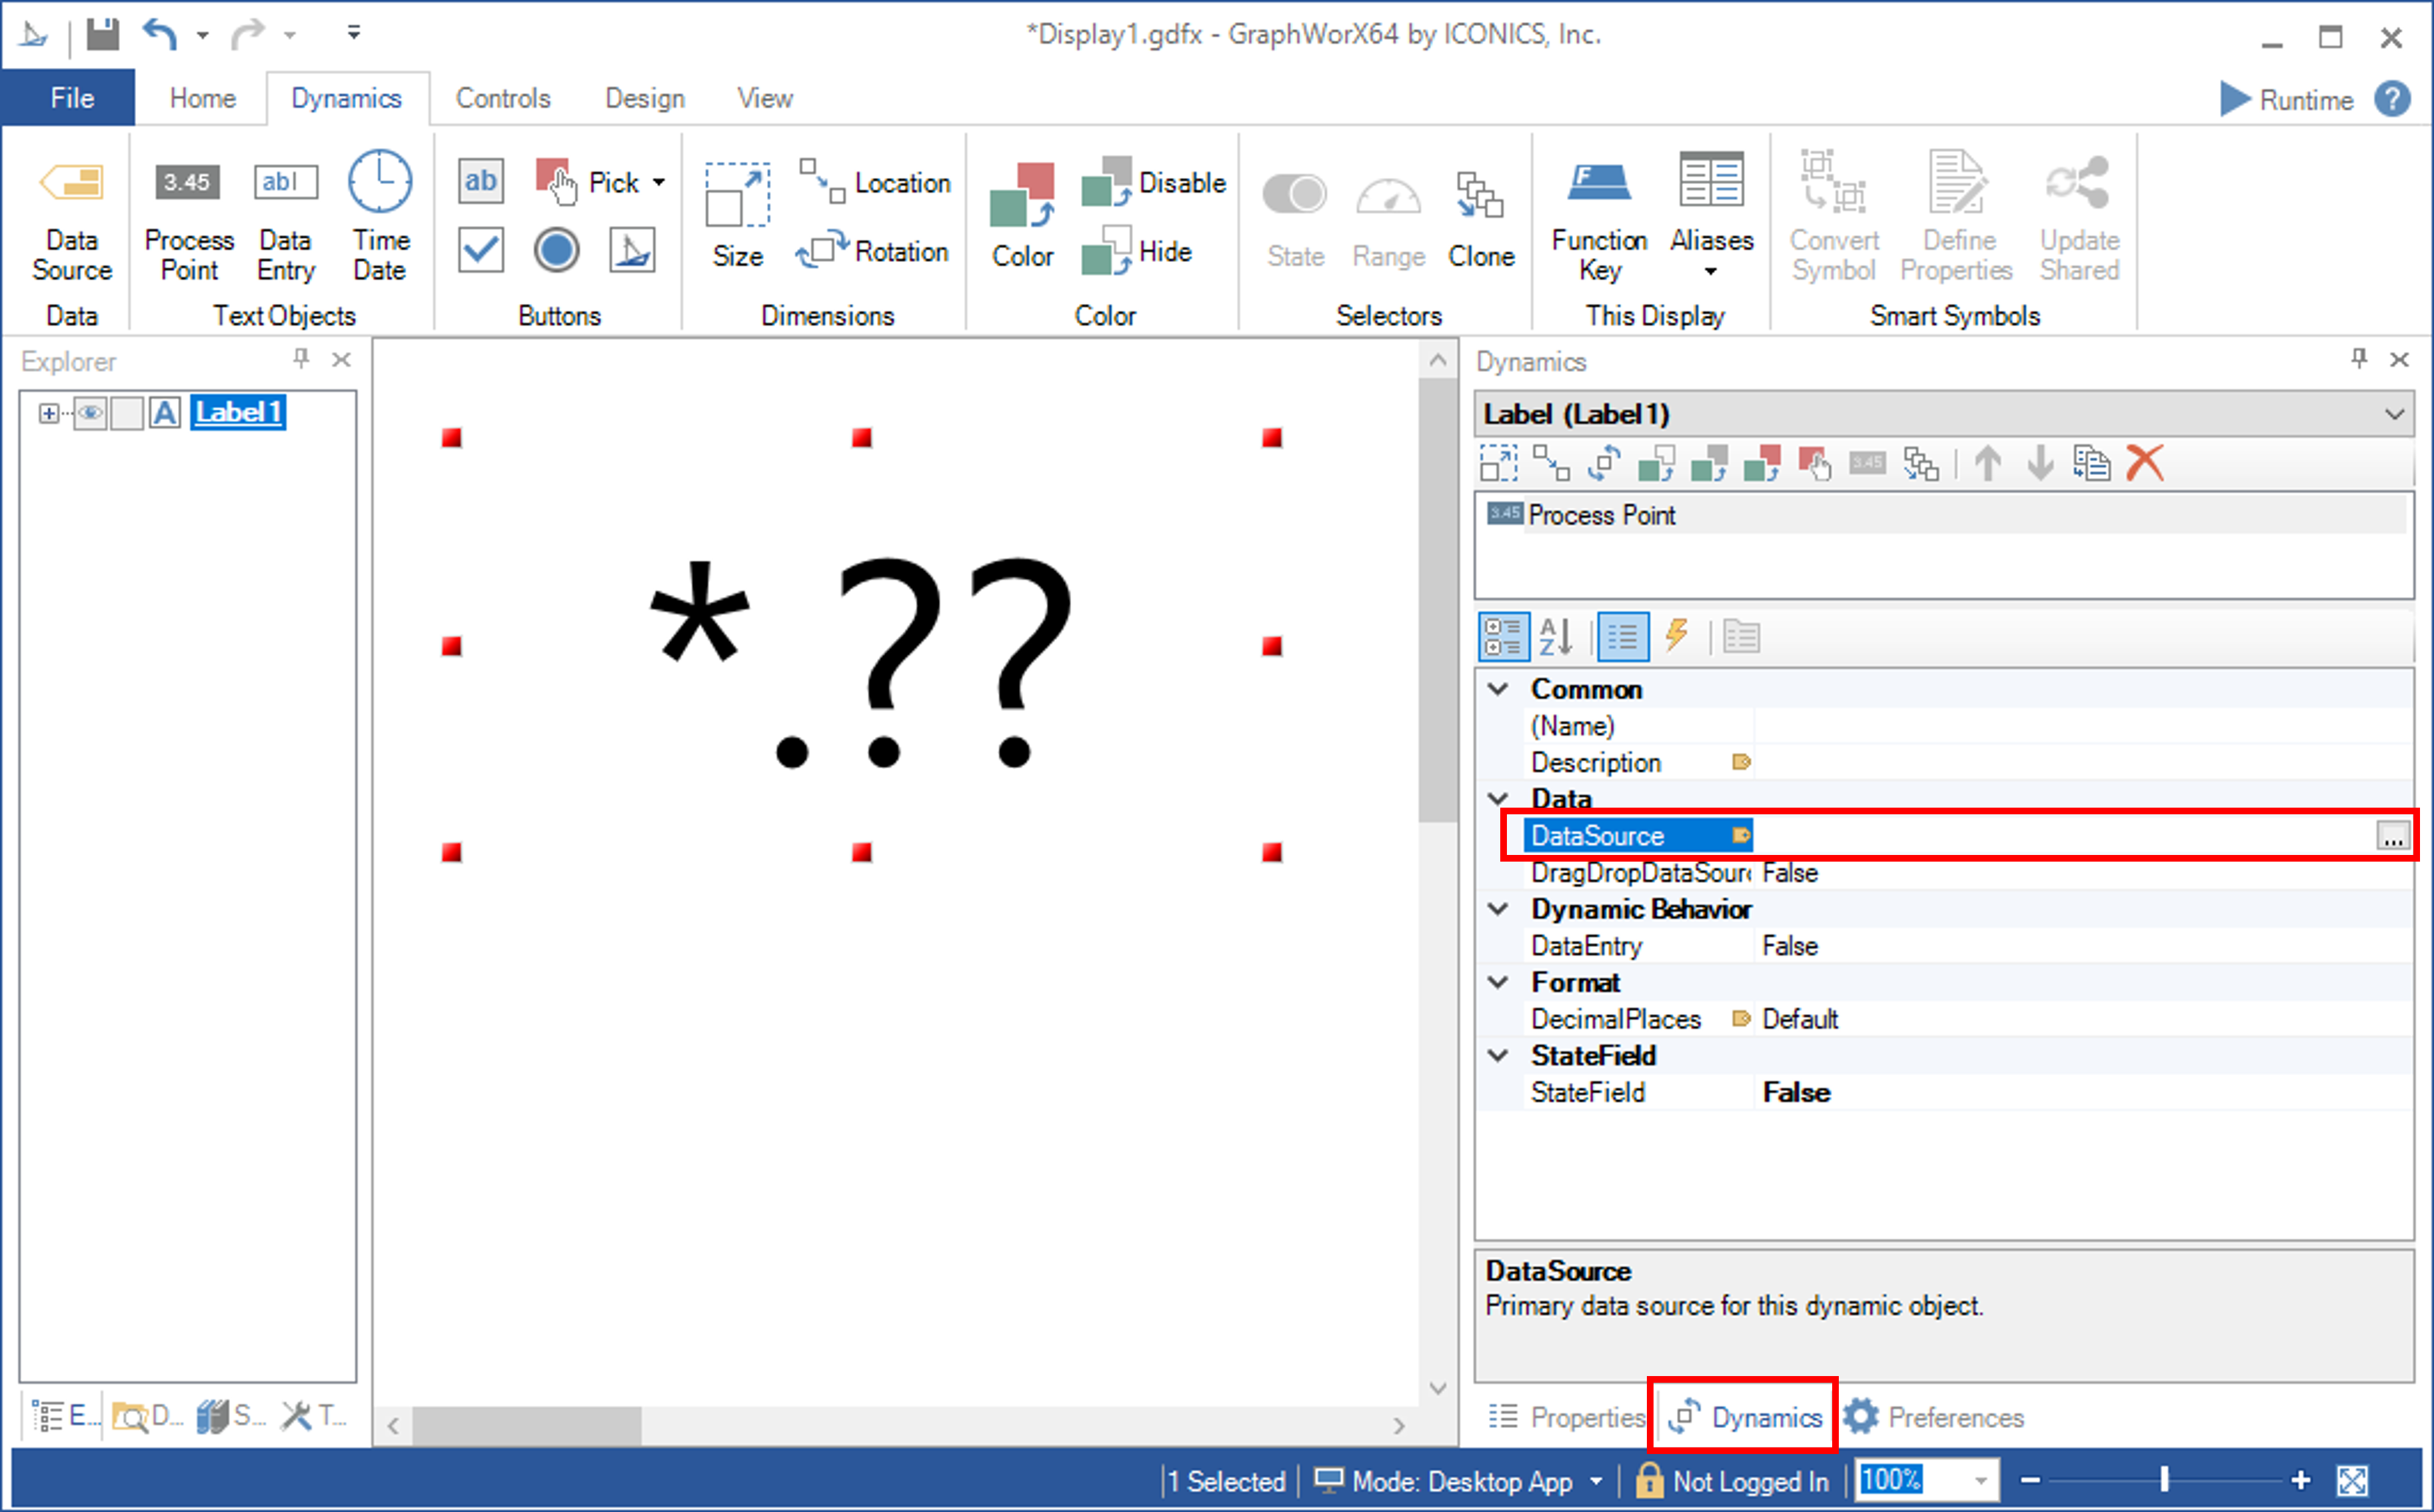
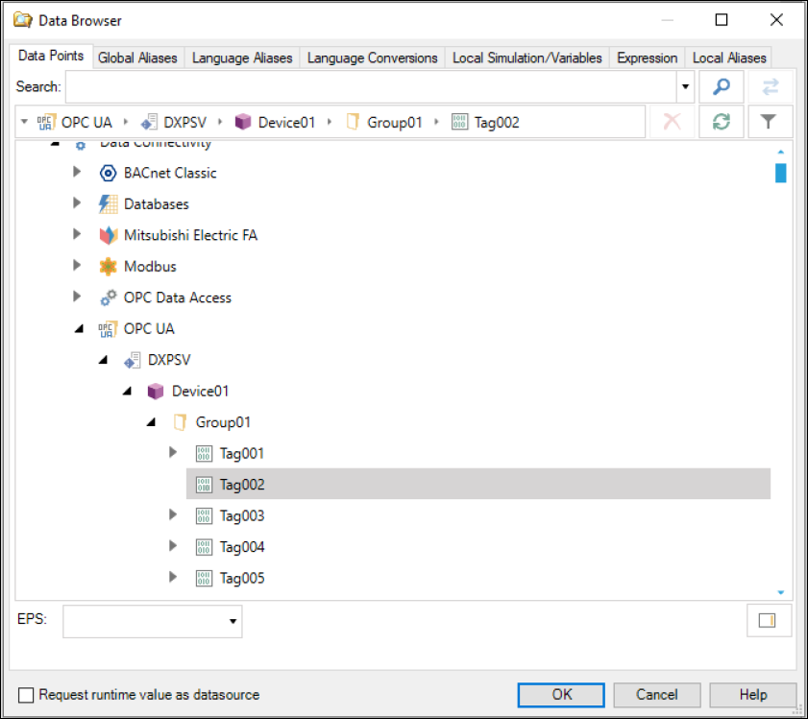
Data Browser will open and select a datasouce in the Data Browser.
[My Computer] > [Data Connectivity] > [OPC UA] > [(UA Server Name configured in Workbench)] > [(Item ID configured in the OPC Server)]
Execution
When execute the Runtime, the GraphWorX start communcating with the datasource of the OPC Server.
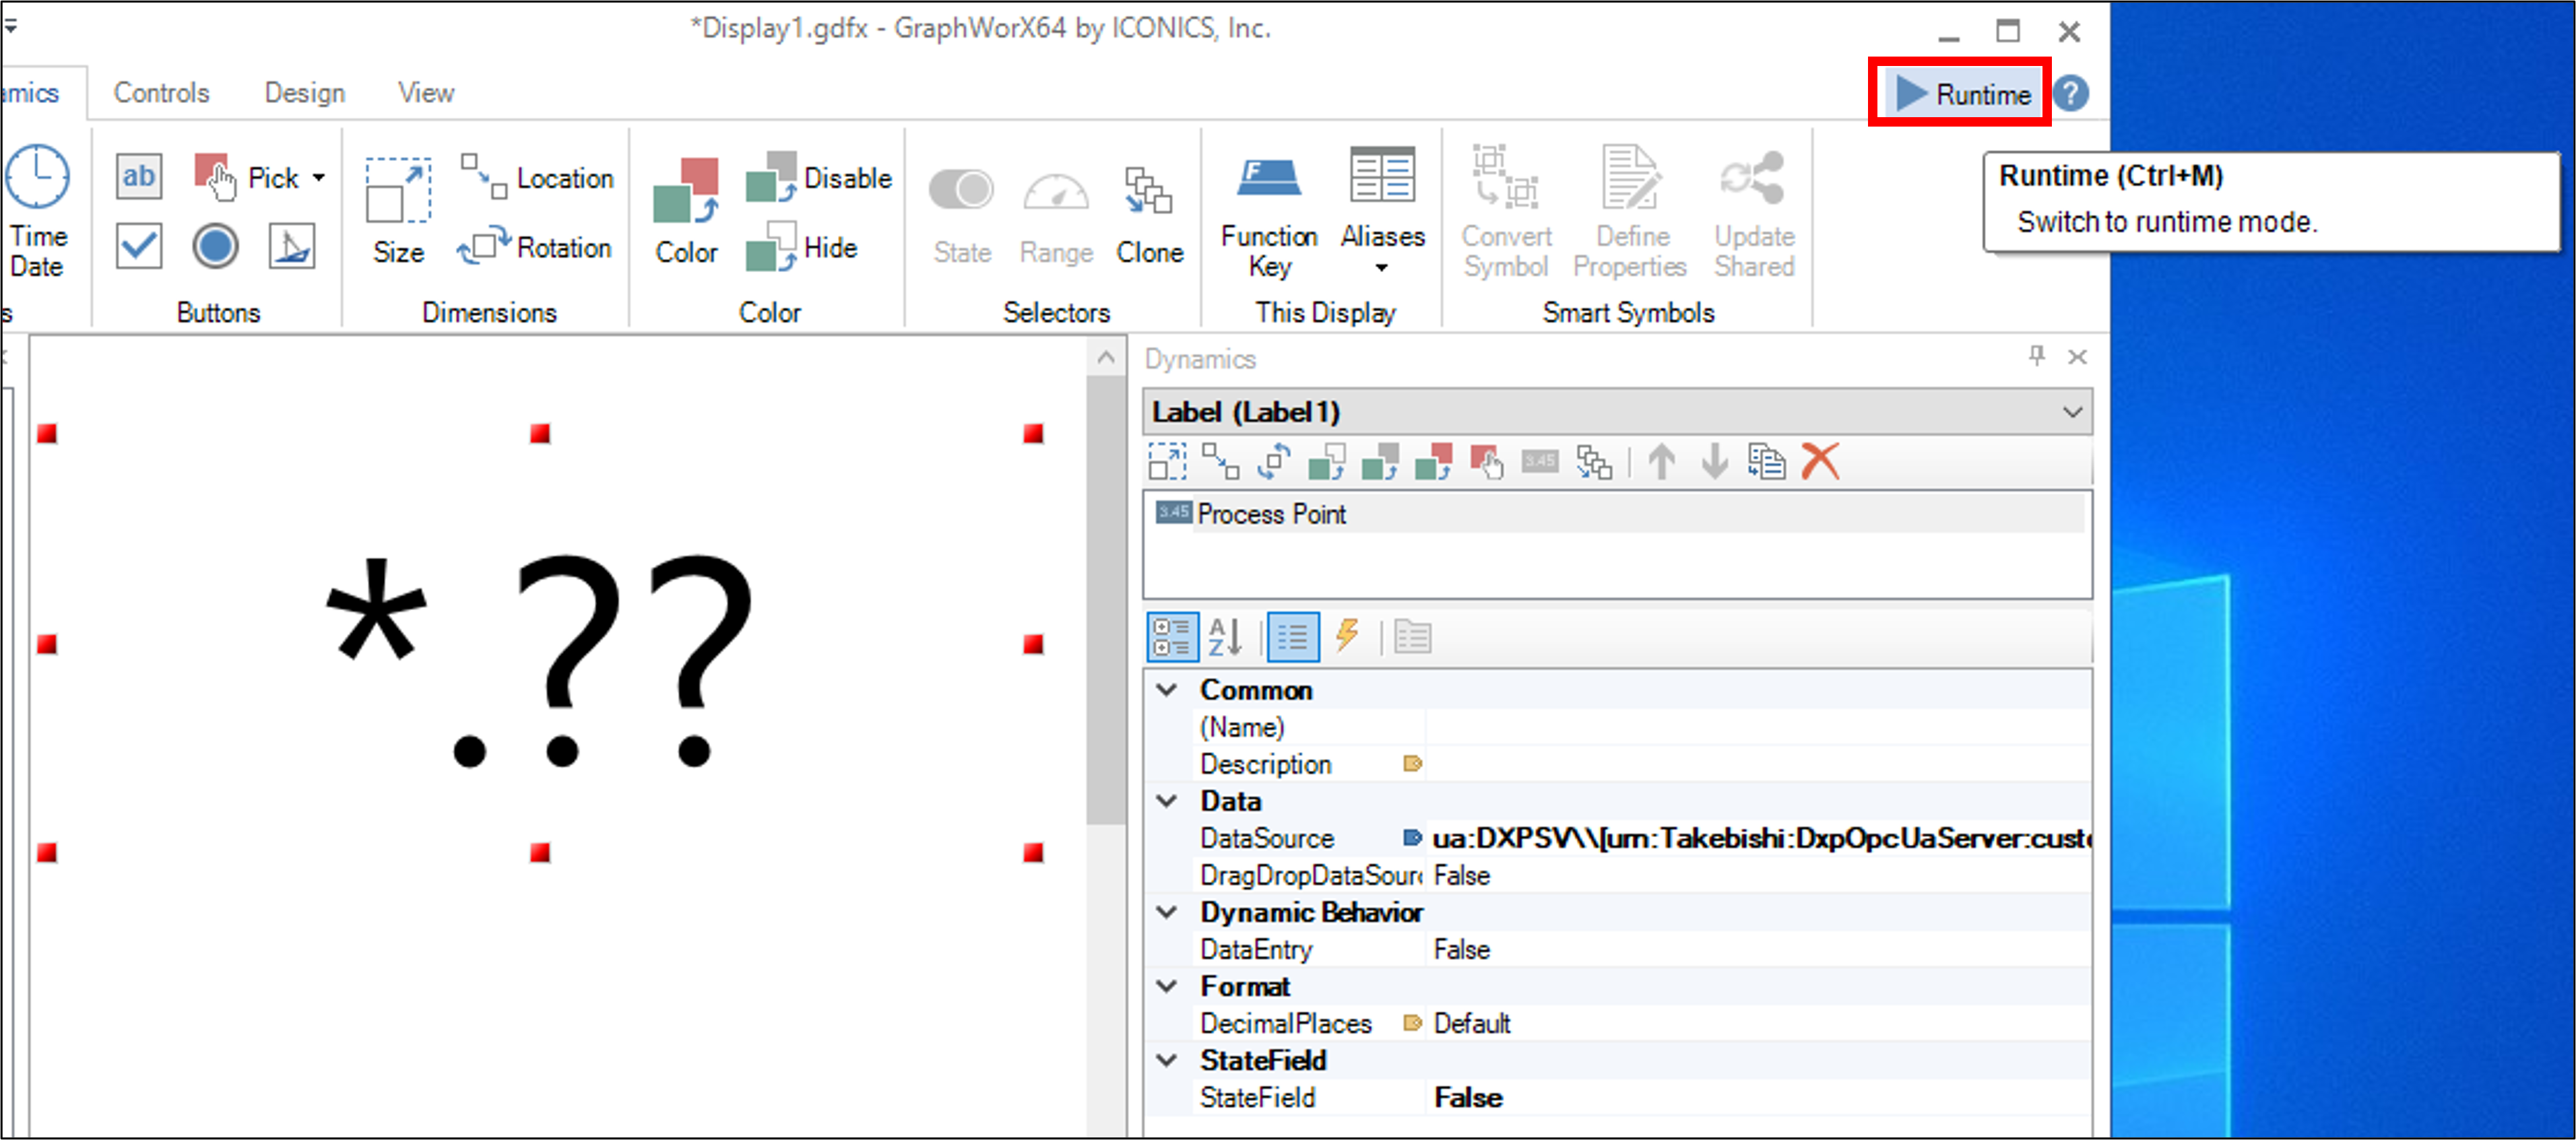
The object placed in GraphWorX shows the same value as the OPC server.