
Products
- TOP
- Products
- DeviceXPlorer OPC Server
- SCADA Guide
- SCADA setting CITECT5
SCADA setting CITECT5
This page is an introduction for setting when OPC Server is used with "CITECT 5.41" of CITECT. We are unable to answer details concerning setting of SCADA, so please make inquiries to the SCADA vendor or the sales outlets.
How to Start CITECT
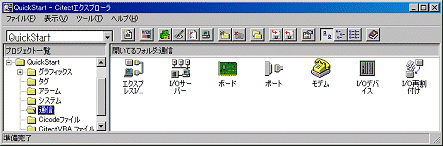
Select Program->Citect->Citect Explorer from Start Menu. CITECT will be started.
Communication Setting
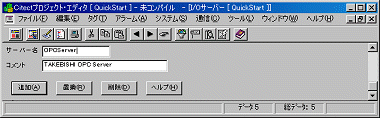
[I/O Server Setting]
Select "Communication" from the project tree of Citect Explorer, and click "I/O Server". Input an arbitrary name and comment, and click "Addition" button.
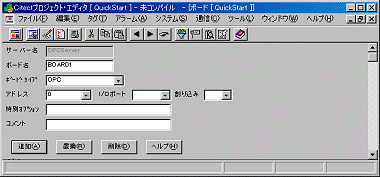
[Board Setting]
Click "Board" of project tree "Communication" in Citect Explorer, and input an arbitrary board name. After you confirm that "Server Name" is set as mentioned above, set "OPC" and "0" to Board Type and Address, and click "Addition" button.
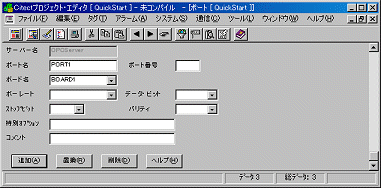
[Port Setting]
Click "Port" of project tree "Communication" in Citect Explorer, and input an arbitrary port name. After you confirm that "Server Name" is set as mentioned above, select the board name, which is added as mentioned above, from the drop down list, and click "Addition" button.
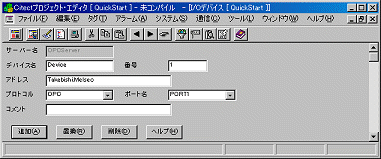
[I/O Device Setting]
Click "I/O Device" of project tree "Communication" in Citect Explorer, and input an arbitrary device name. After you select the port name that you added as mentioned above, set "Takebishi.Dxp" as an address and set "OPC" as a protocol, and click "Addition" button.
Definition of Variable Tag
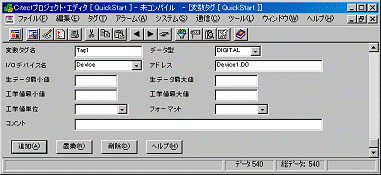
Click "Variable Tag" of project tree "Tag" in Citect Explorer, and input an arbitrary tag name. Select "I/O device name" that you added as mentioned above. And set "device name" + "." + "tag name", which is defined in OPC Server as "address".
Setup Computer
After you put "TAG1" on an arbitrary screen, it is necessary to be able to execute CITECT on local computer. Click "Setting PC" from "Tool" menu of Citect Explorer and start "PC Setup Wizard".
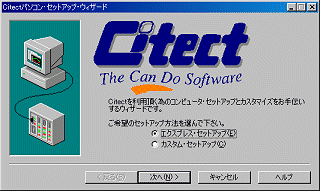
Select "Express Setup" and click "Next".
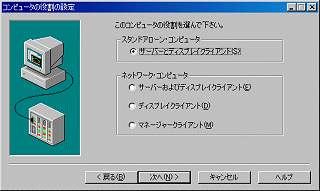
Select "Server and Display Client" of stand-alone PC and click "Next".
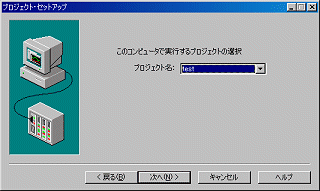
Select project that you created from the drop down list.
Therefore, you can execute the project that you made.
Execution
When you compile the project and execute it, the communication with the OPC Server will be started.